
If you want to get great Milky Way photos, you must know the fundamental techniques and tools to capture the night sky. This includes high ISO. For Milky Way photography, you can use wide angle lenses, Manual shooting mode and a foreground component. This guide should give all the information necessary. Enjoy the ride.
Milky Way Photography requires high ISO
You can try using the automatic exposure function on your camera to take pictures of the milky way, but it is not always possible to get the best results. You should use high ISO to increase your camera's sensitivity. For milky-way photography, high ISO is a good choice. If you are looking for the best quality photos, you can use an aperture of f/2.8. This aperture is perfect for gathering light.
You should also set the ISO on your camera to high to prevent any pixel noise from appearing in the picture. High ISO can be used to create sharper images in milky-way photography. PhotoPills also has a hyperfocal distance calculator that will help you determine the optimal exposure of your subject to achieve the best images. RAW can be used to capture more detail in shadows and highlights, making it easier to edit the image.
Wide angle lens
A wide angle lens is an excellent way to capture large expanses or the Milky Way. Wide lenses have the advantage of capturing a large area of space without having to worry about depth of field. Because it has a large field-of-view, wide lenses can provide more detail. It is important to know how to use the lens.
The first step is to decide the aperture you wish to use. For the best light capture, you'll need to use a wide aperture. For nightscape photography, wide aperture lenses are most commonly used. However, the best lens for this purpose is one that can achieve the highest f/number. These lenses are great for milky-way photography but they have their drawbacks. The Nikon f/2.8 GM with GM zoom is less expensive than that of the Sony 14mm f/1.8 GM. However, they are slower.
Manual shooting mode
For Milky Way photography, you need to use Manual Mode. Manual Mode is required for Milky Way photography. The camera's light meter becomes less accurate as the night sky gets darker. To increase the color intensity of the Milky Way you can use either a radial or white balance adjustment. RAW allows for more precise post-processing.
Another option is program mode. This mode allows for you to control ISO and exposure. This mode can be used to transition between manual and automatic modes. It gives you complete control of the camera's settings. It lets you adjust the exposure settings, such as the depth-of-field and other exposure settings. This mode is ideal for photographing moving subjects. You can change the ISO and try experimenting with different exposures. This mode is not recommended for beginners.
Use a foreground element
A foreground element can be used to create unique compositions for Milky Way photos. This simple technique is a good way to create a unique image. In this technique, you use a foreground subject that stands out, either on its own or in combination with the Milky Way. The Milky Way can be the main focus, but the foreground subject should be just as interesting. A tall rock can serve as a perfect foreground subject. The use of a foreground element gives the image a break from the surface and allows the viewer to see the composition from a different angle.
Ideally, the sky is completely dark, without any moonlight. To achieve this look, turn off the autofocus feature on your camera. Instead, use a manual lens to focus manually. You should also ensure that the background element is sharp. The goal is to create beautiful images. Then, use the focus ring to focus on the brightest star in the sky, such as Jupiter if it's visible.
FAQ
Cameras for Sale
There are many online places where you can purchase cameras. However, we recommend buying from a reputable retailer like B&H Photo Video. They are able to assist you with any questions.
B&H also ships quickly and securely, making it easy to get your order delivered to your door.
If you want to learn more about shopping for cameras, check out this video.
What makes a camera bag good?
Because it protects your equipment while you are traveling, choosing a camera backpack is crucial. Here are some things to remember when buying a bag.
-
To comfortably carry your accessories and camera, choose a large bag. Don't get any bigger than you really need.
-
Durability: Bags made of durable materials such leather, canvas and nylon are best. Avoid plastic or fabric bags.
-
Protection: Make sure your bag protects against dust, dirt and moisture.
-
Organization: Sort your gear by type in order to make it easy to access the items you need. So, you can place your lenses in one box, your memory cards in another and your battery charger in a third.
-
Comfort: Keep your hands free when shooting by using a shoulder strap instead of a handbag. You should also look for a design that is comfortable and has padded straps.
-
Price: Shop around to find the best price. Some brands sell their products at discount prices, which can be an added bonus.
-
Warranty: Ask if the company offers a warranty on its products. You will know who to call if your bag gets damaged.
Which Camera Should I Buy?
It all depends upon what kind of photographer your goal is to become. A basic point-and-shoot camera is probably all you need if you're just starting out.
But once you are comfortable with the basics, you will probably need more. It really is up to you what you prefer.
These are some things you should consider before buying a camera.
-
Features: What features do you need? Are you going to use autofocus, manual settings, or both? How many megapixels do you have on your camera? Is there an optical viewfinder?
-
Price: How much money are you willing to spend? Are you planning on upgrading your camera every two years?
-
Brand: Will you be happy with the brand you select? There is no reason you should settle for less.
-
Functionality: Can you use your camera in low light situations? Are you able to take high-resolution images?
-
Image Quality - How clear and sharp is your image quality?
-
Battery Life: How much time will your camera last without needing to be recharged?
-
Accessories: Can you attach extra lenses, flashes or other accessories? ?
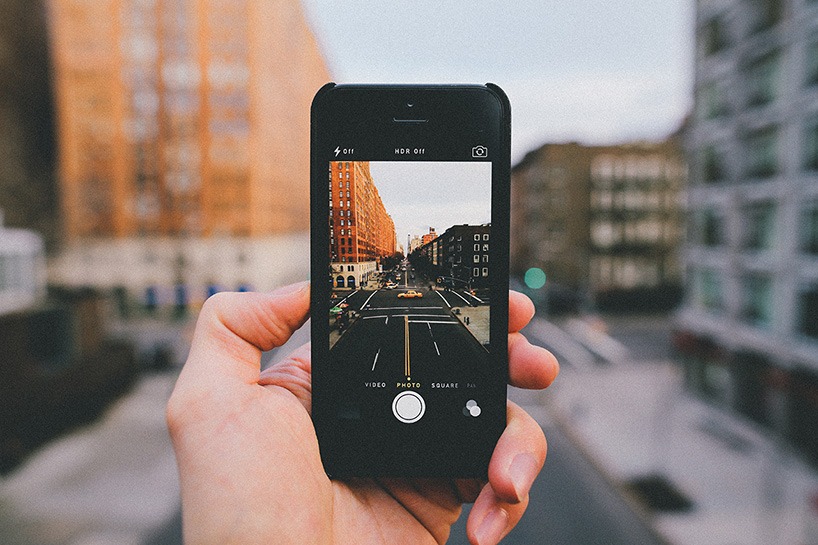
What can I do to improve my photography skills with my phone?
To take amazing photos, you don't necessarily need to have expensive equipment. With just a smartphone, you can capture amazing images.
It's easy to get started with the software.
There are many apps to help you edit and share your photos on both Android and iOS.
These five tips will help you take better photos.
-
Set Up Your Camera App. Your camera app should already be installed on your device. If not, download it from Google Play or Apple's App Store.
-
Use Filters & Effects. Filters and effects allow you to change the appearance of your photo without having to touch your image.
-
Adjust the Exposure. Adjusting the exposure can help you control the brightness in your picture.
-
Photograph in the Right Light Bright light allows you to better see the details of your subject. Shooting in low light conditions lets you capture the shadows and highlights in your image.
-
Take Pictures of People. Photographing people can show others what you are most passionate about.
You can learn more about how to capture better photos by checking out our article, 5 Tips To Improve Your Photography Skills on a Smartphone
What Lenses Should I Use
Beginners often ask, "What lens should I purchase?" There are many options. It can be difficult to make a decision.
The good news is you don't always need to buy a different lens with every purchase of a camera. You can instead add lenses later.
These are just three options for lenses that you might consider.
-
Wide Angle Lens (14mm - 24mm): These lenses give you a wide angle of view, allowing you to capture more of your subject. You can zoom in to improve image quality.
-
Standard/Normal Zoom Lens (28mm-70mm): These lenses let you change the focal length while still maintaining excellent image quality.
-
Telephoto Zoom Lens (70mm to 200mm): These lenses make it easy to capture distant subjects. They let you focus on your subject even though they appear small in the frame.
You can also combine these lenses to create different effects. Combining lenses can create different effects. For example, a normal lens could be used to capture small details while a telephoto lens is used to capture faraway objects.
How do I become an excellent photographer?
Photography is an art that takes patience, dedication and passion. Passionate about photography will make you do better than if it was just for the money.
It is essential to understand how to use your camera effectively. You must understand composition, lighting, exposure, depth of field, etc. You also need to have a decent understanding of Photoshop.
Photography is not easy, but once you master it, there is nothing quite as satisfying as creating images that capture moments in time that would otherwise have been lost forever.
You can improve your skills by reading books, attending classes, and participating in competitions. You'll gain experience and confidence which will lead to further improvement. What equipment do I need?
It all depends on the type of photography that you are interested in. If you are interested landscape photography, you will need to have a wide-angle zoom lens.
A telephoto lens is essential for portrait photography.
A tripod is essential when taking photographs. You can stand back and compose the picture, without having to move.
A camera bag can be used to carry your camera, memory cards, or other accessories.
If you have a compact digital camera, a flash unit will be necessary.
A DSLR (Digital Single Lens Reflex) camera is by far the best choice for beginners who want to take professional quality photos.
DSLRs are very popular as they let you control all aspects of your photos, such as shutter speed, aperture and ISO sensitivity. There are many features available, including autofocus, self-exposure lock (auto-exposure lock), bracketing, and RAW format.
How do you get started in digital photography
First, you need to decide what type of camera is best for you when you first start digital photography. There are many options available, including DSLRs (digital single-lens reflex cameras), compact point-and-shoot cameras, camcorders and smartphones. Each has its own benefits and features. DSLR cameras, for example, offer superior quality images but are heavier and larger than other types. Point-and-shoot cameras are smaller and lighter and often include automatic settings for certain situations. Camcorders can record excellent video and have some still photography modes. Smartphones can be small and lightweight and are easy to transport.
Once you've decided on the type of camera you'd like to buy, you will need to decide whether you would rather buy a used or new one. If the camera was purchased in the past few years, it is possible to find used cameras at reasonable prices. New models generally cost more because manufacturers spend large amounts of money developing new technology.
Next, you will need lenses. Lenses are a critical part of determining the quality your photos. You can adjust the focal length of the lens to allow you to zoom in on the scene without losing focus. Some lenses can be equipped with flash units that are built-in, while others may require external flash units. A wide range of lenses is available from various brands, each offering unique characteristics.
Finally, you will need to invest in memory cards. Memory cards save pictures taken with your camera. You can store hundreds, thousands, or even more pictures depending on the size of the card. Multiple memory cards are required if you intend to take many pictures.
Statistics
- In this case, 100% of readers who voted found the article helpful, earning it our reader-approved status. (wikihow.com)
- This article received 13 testimonials, and 100% of readers who voted found it helpful, earning it our reader-approved status. (wikihow.com)
- Get 40% off Adobe Creative Cloud(opens in new tab) (creativebloq.com)
- That's the easiest way to get blurry photos 100% of the time. (photographylife.com)
External Links
How To
How to take macro shots in photography
Macro Photography is defined as the ability to capture small objects such as flowers, insects, and even people at close range. The term "macro" comes from the Greek word makros (makros), meaning large. When you use a lens with a focal length greater than 50mm, you can take pictures of things that are very close up.
A macro lens that is good should have a long working range and a fast aperture to get sharp images. Also, avoid moving while taking photos as it could blur your image.
Here are some tips for taking great macro photographs:
-
Use a tripod. Set up a table or chair so you don’t knock anything over. This will reduce the chance that you move when trying to take photos.
-
Pick the right lighting. You can get a macro lens with built-in lights filters. However, if you don’t have one, you can purchase one. This helps prevent overexposure.
-
Be patient! Shooting macros takes practice. Sometimes you might only be able see a very small insect or flower. However, it's worthwhile to keep shooting until it appears.
-
RAW files are best for shooting. RAW files can store more information than standard JPEGs. RAW files can be edited later and allow for more detail such as cropping and color correction.
-
Don't forget the background. The background can sometimes add interest to your shot even though it is a foreground item. Include it in your shot.
-
Keep learning.