Three-point lighting plays an important role in visual media like film, theater and still photography. It ensures even lighting distribution throughout the scene. It is often used in 3D computer graphics or computer-generated imagery. There are many different types of three points lighting. Here are some of the most common examples.
Three-point lighting
Three-point illumination is one of most preferred lighting methods. It can be used to create a variety different shooting situations. The idea behind three-point lighting is to create an atmosphere. Three light sources are placed over the subject. These lights can either be neutral or colored, and can be either a key or fill light. To achieve the desired effect, the three points are used to paint the subject using light. It is versatile and can be used indoors or outdoors for ambient lighting.
A three-point lighting arrangement can use three to four lights depending on the amount available. You can use a key light to illuminate the whole subject, or a fill light to provide backlight. The key light should be 25 to 50% more intense than the fill.
Kicker light
A kicker light is an additional lighting source that can be used to enhance contrast between the background and the model in photography. Often used for corporate headshots, it can add dimension to a portrait and give it a polished look. The light source should either be located behind the model or one side to the frame.
The Kicker light should be placed exactly where the subject is looking. You can adjust the intensity of these lights using feathering. This technique is perfect for a Kicker as it helps to control the light spread. Some photographers prefer having their Kicker placed on the same side of their subject as their Key Light. The Kicker should provide a stronger light than the Key Light.
A Kicker lighting can create depth and dimension to your composition. Using a Kicker light is not necessary for all portrait photography, however.
Fill light
When using 3 point lighting to photograph a subject, it is important to balance the brightness of all three lights for the best results. This type of lighting can create shadows on the subject's skin so make sure you choose the right brightness for each light. To achieve the ideal balance, you can use a bounce board, diffuser, or move the light source.

The three-point light source is comprised of the key, fill and backlight. The key lighting source is the primary one, as it casts the most direct light onto your subject. The fill light is the second source of light and will soften any shadows cast by the key lighting. The back light will be behind the subject.
Three-point lighting makes it possible to make the subject stand out and appear three-dimensional. It allows for you to control the depth of shadows and their tone. To soften shadows on your subject's face, adjust the key or fill light. The fill light is also extremely important because it can change the mood of your shot.
FAQ
Is photography a worthwhile career?
Photography is an artistic form that allows one to capture and share moments in time. It can also make you a lot of cash if your are willing to do the work. There are many options for professional photographers. You can start by taking photos as a hobby for family and friends. This would improve your confidence and skills. After you've mastered this stage you can move onto paid assignments. Photographers who are the best earn a living doing what they love. They may take clients to events such as weddings and parties, where they must capture images of people enjoying themselves. However, most professionals prefer to shoot commercial projects such as product shots or advertisements.
Finding the type of photography that you love is key to being a successful photographer. Next, practice, experiment, try new techniques, until you feel comfortable with your technique. Experience is the best substitute, so don’t expect success overnight.
As a beginner, you should aim to develop your technical skills first before focusing on creativity. Photography can be both artistic or technical. You will be able to succeed quicker if you learn how to use the right tools, and the basics of composition.
You should also consider whether you want to pursue a career in photography full-time or part-time. Some people combine their passions for photography with other careers. You might be able to work for a local newspaper while also pursuing freelance projects. Others may choose to devote their whole time to photography. You have to put in the effort and be committed to any creative endeavor.
It is important to take the time and effort necessary to make a career out of photography. You should think about whether this is something you want to dedicate your life to.
Do I Need A Tripod?
This is a question everyone asks. Although a tripod might not always be needed, they can be useful.
It allows you to hold your camera steady when taking pictures at slow shutter speeds. A tripod can make all the difference when you're photographing landscapes or other stationary subjects.
However, tripods can blur the images of moving subjects like sports and people. How can you tell which situations call for a tripod and why?
A tripod is useful in situations where you want to take pictures of fast action and stationary subjects. Examples include:
-
Sports
-
People
-
Landscapes
-
Close-ups
-
Macro shots
You can use this test to determine whether you need a tripod. Keep your camera still, and then look through the viewfinder. A tripod is necessary if you notice blurred lines or movement.
A tripod will not improve blurring if you don't notice it.
If you do decide on a tripod purchase, these are some things to remember.
-
Smooth legs are a must for your tripod. This helps to prevent vibrations from shaking the camera.
-
You should choose a sturdy tripod. Some tripods are made of plastic, so they may not be as durable. Opt for a sturdy metal tripod.
-
Buy a remote release. Remote control allows you to remotely control your camera. The button can be pressed to activate the shutter.
-
Try to find a tripod with a head that rotates 360 degrees. This makes it easier to position your camera vertically or horizontally.
-
Be aware that tripods are not cheap. Expect to spend between $100 and $200. You'll still get a lot for your money.
-
Don't forget accessories such as memory cards or filters.
-
Before buying online, check with your local store. Many retailers offer free shipping.
-
Read reviews to determine what customers think about a particular product.
-
Ask friends and family members who own similar products.
-
Forums and message boards are a great place to find out about customer experiences.
-
You can search online for reviews from other users.
-
Amazon.com allows you to compare prices, and receive customer feedback.
-
Check out these photo galleries for an example of the work that photographers do with their tripods.
How can I improve the quality of my photos on my phone
Great photos don't require expensive equipment! With just a smartphone, you can capture amazing images.
All you need to do is to be able to use the features of the program and to master some basic techniques.
Many apps are available for iOS and Android that allow you to easily edit and share photos.
Here are five tips that will help you start taking better photographs.
-
Set Up Your Camera App. Your camera app should come pre-installed on your device. If your camera app isn't installed on your device, download it from Google Play.
-
Use effects and filters. Effects and filters allow you to alter the appearance of your photos without needing to touch them.
-
Adjust Exposure. You can adjust the exposure to control the brightness of your photo.
-
Take the right lighting. Photographing in bright lighting makes it easier for you to see details within your subject. Shooting in low light conditions lets you capture the shadows and highlights in your image.
-
Photograph People. It is a great way to share your love with others by taking pictures of them.
Learn more about taking better photos with your smartphone by reading our article 5 Tips to Improve Your Photography Skills.
What camera is best for beginners and what are the pros and cons?
Your budget, your needs, and your skill level will determine which camera is best for beginners.
For instance, you could choose a point & shoot digital camera if your goal is to save some money. These cameras can be very versatile, but they offer excellent quality.
Digital Single Lens Reflex (DSLR) cameras have interchangeable lenses that allow you to shoot various types of shots. While they are more expensive than point and shoots, they offer much more flexibility.
A beginner's kit is the best place to begin if you are new to photography. Everything you will need, including a tripod, flash, memory cards and lens, can be found in one package.
Don't forget to buy extra batteries too!
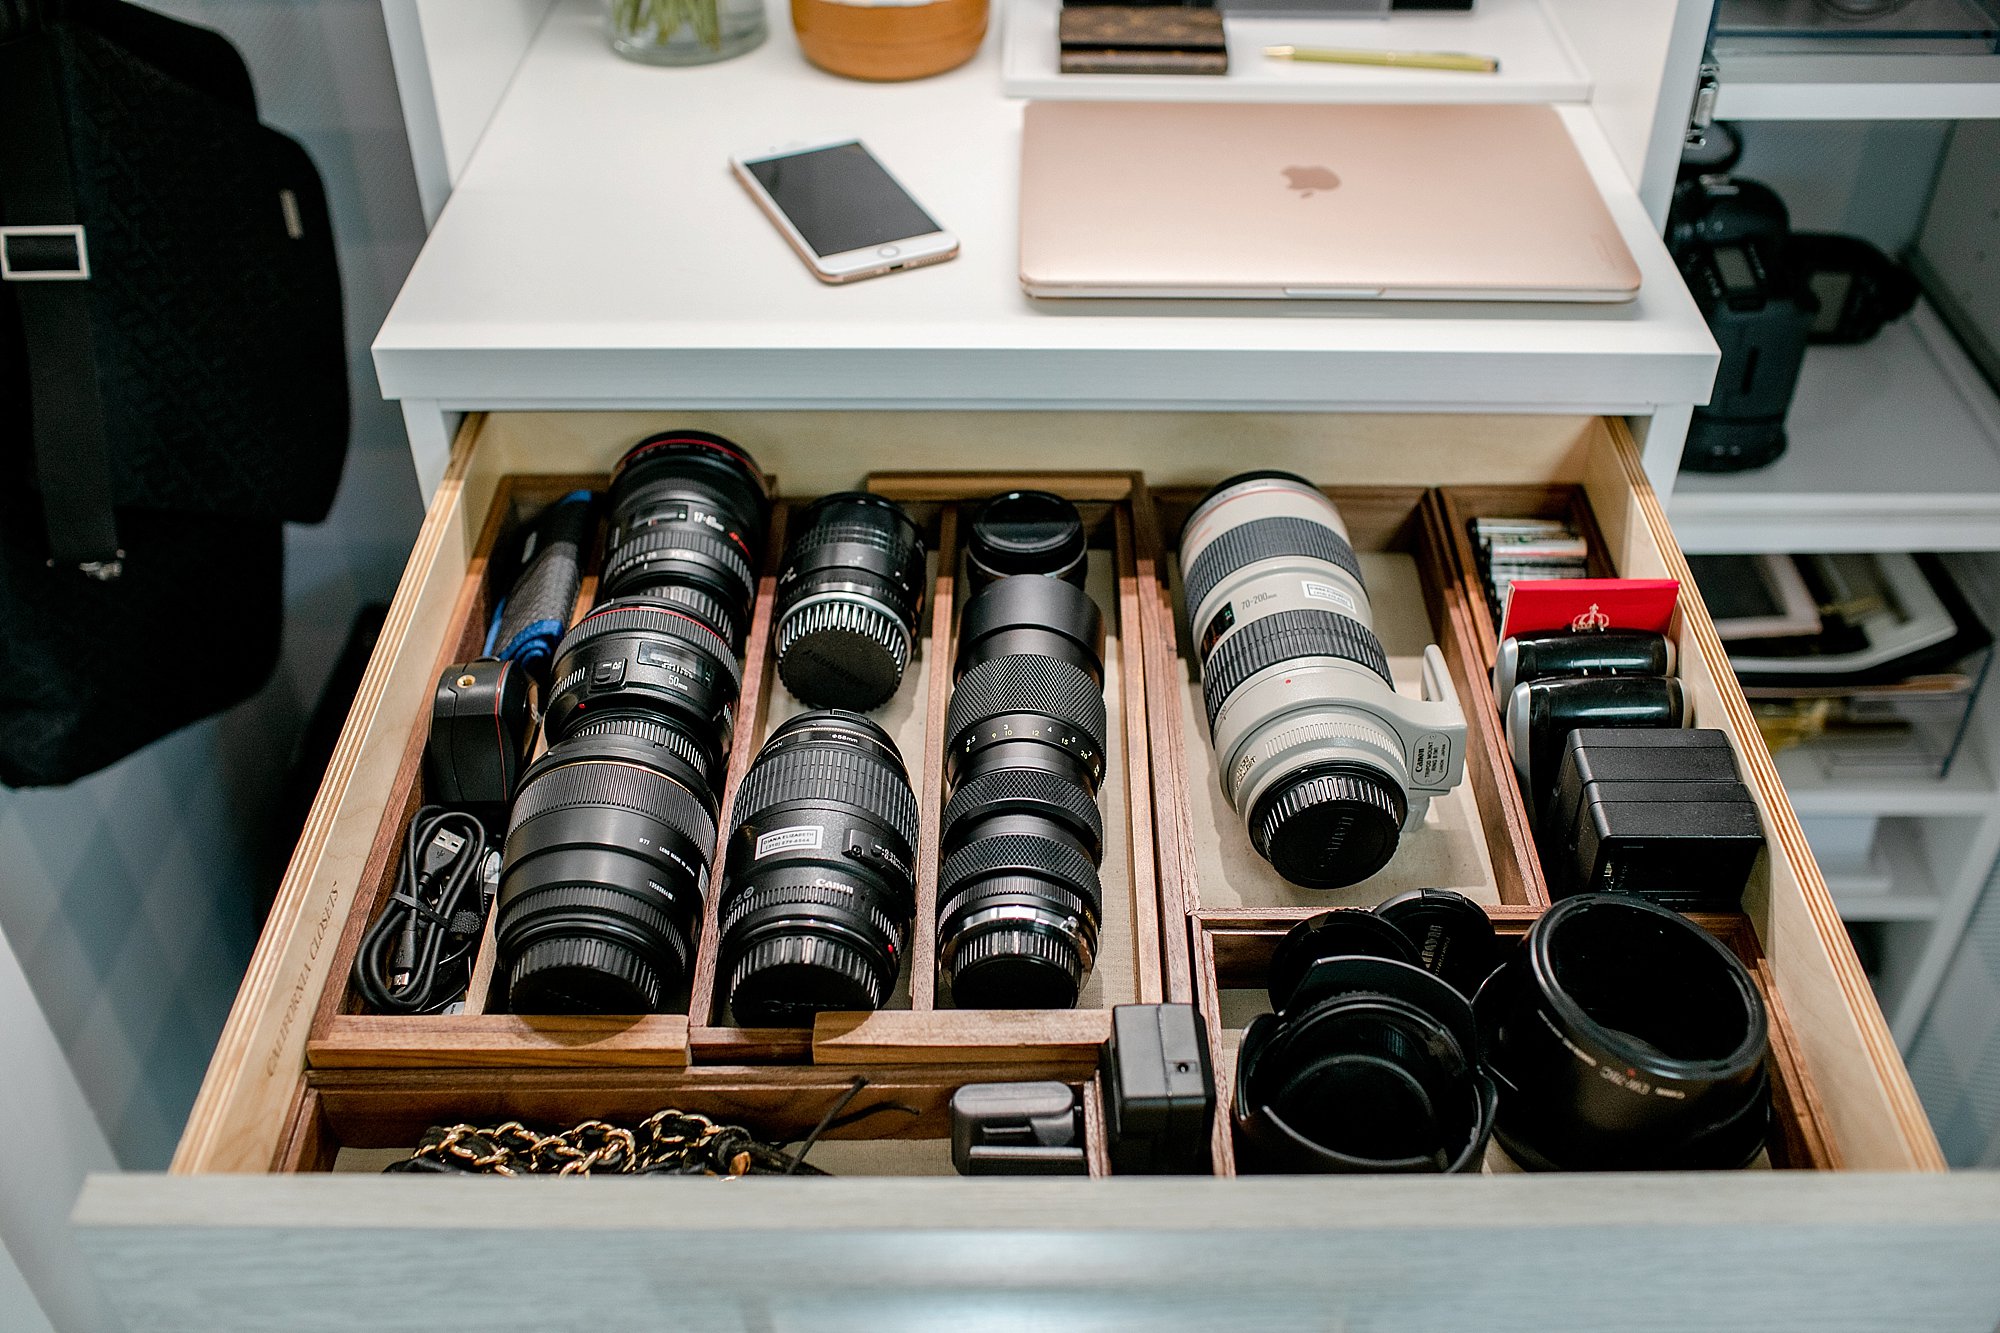
Which Lenses should I Use?
Beginners often ask, "What lens should I purchase?" It's a tough decision since there are so many options available.
The good news? You don’t have to purchase a completely new lens for every new camera you buy. Instead, you can add lenses later on.
For starters, here are three types of lenses you might want to consider.
-
Wide Angle Lens (14mm to 24mm): These lenses allow you to see more of your subject from a wider angle. You can zoom in and not lose image quality.
-
Standard/Normal Zoom Lens (28mm – 70mm): These lenses allow for you to adjust focal lengths and maintain image quality.
-
Telephoto Zoom Lens (70mm, 200mm): These lenses work well for distant subjects. These lenses allow you to focus on your subject, even though they may appear small in the frame.
Combining lenses can create different effects. To capture close-up details, you can switch between a normal and telephoto lens.
What is a good camera bag?
Choosing a camera bag is important because it protects your gear while traveling. These are the things to consider when shopping for a bag.
-
Size: Choose a big bag to hold your camera and accessories comfortably. Do not buy more than you need.
-
Durability: Bags made of durable materials such leather, canvas and nylon are best. Avoid plastic or fabric bags.
-
Protection: Make sure your bag protects against dust, dirt and moisture.
-
Organization: Consider organizing your gear by type to easily access your needs. For example, put your lenses in one compartment, your memory cards in another, and your battery charger in yet another.
-
Comfort: A shoulder strap is a better choice than a handbag for shooting. Also, look for a comfortable design with padded straps.
-
Price: Check around to find the best prices. Some brands sell their products at discount prices, which can be an added bonus.
-
Warranty: Make sure to ask if they offer a warranty for their products. If your bag is damaged or lost, this will let you know who to contact.
Statistics
- The second easiest way to get blurry photos 100% of the time is to use a cheap filter on the front of your lens. (photographylife.com)
- In this case, 100% of readers who voted found the article helpful, earning it our reader-approved status. (wikihow.com)
- That's the easiest way to get blurry photos 100% of the time. (photographylife.com)
- By March 2014, about 3 million were purchased monthly, about 30 percent of the peak sales total. (en.wikipedia.org)
External Links
How To
How to take macro shots with photography
Macro photography can be defined as the ability of taking pictures at close range of small objects, such insects or flowers. Macro (from the Greek makros, meaning large) is from the Greek word makros. It is possible to capture images of very close objects if you have a lens with a focal range greater than 50mm.
A macro lens of high quality should have a large working distance and an aperture fast enough to produce sharp images. Also, avoid moving while taking photos as it could blur your image.
Here are some great tips to create stunning macro photographs.
-
Use a tripod. You can use a tripod if you don't own one. This will make it less likely that you are moving when shooting.
-
Select the right lighting. The majority of macro lenses include built-in light filter, but you can buy one separately if necessary. It helps to prevent overexposure.
-
Be patient! Shooting macros takes practice. Sometimes you might only be able see a very small insect or flower. However, it's worthwhile to keep shooting until it appears.
-
RAW files are best for shooting. RAW files are more detailed than standard JPEGs and contain more data. RAW files can be edited later and allow for more detail such as cropping and color correction.
-
Remember to include the background. Even though you've got a nice foreground object, sometimes the background adds interest to your shot. Include it in your shot.
-
Keep learning.